
TECHNOLOGY
Selenium WebDriver Explained for Beginners

Selenium WebDriver is a widely used framework in the software sector. But if you’re new to it, you must be wondering What is Selenium WebDriver? and How does it work? Simply put, it’s a robust automation framework that assists developers and testers in verifying whether sites are functioning according to the expectations of the users.
Web testing becomes easier and faster for all of us with Selenium and its WebDriver. It all begins with Selenium WebDriver. It is easy to use and well-supported by many programming languages such as Java and Python. Testing websites across several browsers, like Chrome and Firefox, can be accomplished with Selenium.
Selenium WebDriver: Time To Magnify The Deets
Selenium WebDriver is an automated web browser tool. It feasibly and efficiently works with all the most commonly used browsers like Chrome, Firefox, Edge, and Safari. Tester can even test using Java, Python, C#, or JavaScript.
WebDriver is quick and natively supports control over browsers, so tests run smoothly and quickly. Selenium WebDriver is unique from the rest of the Selenium tools. Selenium IDE is an easy tool to record and replay tests written in simple terms.
Selenium Grid allows tests to run on several devices simultaneously. WebDriver is the primary framework used for making flexible and efficient test scripts.
You can test web applications on majorly browsers and Operating Systems (OSs) using Selenium WebDriver. It makes bug detection easier before users notice them. WebDriver is used by various organizations for web testing. WebDriver is one of the most suitable tools to learn web automation using.
Steps to Set Up Selenium WebDriver
The following are steps to set up Selenium WebDriver;
Step 1: Obtain Prerequisites
Download a programming environment such as Java or Python. A tester should install and download a suitable Integrated Development Environment (IDE) like Eclipse or VS Code. Also do ensure that there is a web browser such as Chrome or Firefox already installed on your device.
Step 2: Download Selenium WebDriver Libraries
Download the Selenium WebDriver library for your chosen language from the official website. Include this library in your project in your IDE.
Step 3: Download the Browser Driver
Download the appropriate driver for your browser, like ChromeDriver for Chrome or GeckoDriver for Firefox. Put the driver file within a folder on your system. Set up the driver path in your code or system properties.
Step 4: Generate Your First Selenium Script
Open a rapid script in your IDE. Use commands such as driver.get(“https://www.example.com”) to load a web page. Incorporate actions such as button clicks or submission of a form.
Step 5: Execute the Script and Confirm Outcomes
Execute your script in the IDE. The browser will launch and execute your actions. If there are any errors, you should double-check your driver path and library configuration.
Selenium WebDriver Architecture
Selenium WebDriver employs a simple but robust architecture that can easily automate browser interactions. It bridges your test scripts to actual web browsers via special browser drivers such as ChromeDriver or GeckoDriver. The core components include the WebDriver Application Programming Interface (API), browser drivers, and browsers themselves.
When you execute a Selenium script, your program instructs the WebDriver API. The WebDriver API instructs the browser driver with commands using a protocol like JSON Wire Protocol or the W3C protocol in later versions.
The browser driver serves as an intermediary and receives commands, sending them to the actual browser. The browser acts, such as a button click or page open, and returns the results to your script through the driver.
This bidirectional command flow is compatible with all the major browsers. There is a distinct driver for every browser, and therefore, you can switch from Chrome to Firefox, Edge, or Safari by modifying the driver.
Clean segmentation of browsers, drivers, and scripts makes Selenium WebDriver easy to implement and suitable for cross-browser testing. This design allows the browsers to be controlled by the testers for web automation in a consistent manner.
Basic Selenium WebDriver Commands
Selenium WebDriver employs straightforward commands to communicate with browsers and automate web activities. You begin by opening a browser window using a command such as driver = webdriver.Chrome().
This instructs Selenium to employ Chrome, although you can choose other browsers as well. To open a website, use the driver.get(“https://www.example.com”). This code opens the page in your browser.
To move from one web page to another, you must locate elements such as buttons or text fields. Selenium gives you options of how to locate elements by ID, name, class, XPath, or CSS selector.
To locate a field by its ID, say, use driver.find_element(By.ID, “username”). If there is no ID, you can use XPath or a CSS selector to locate what you want.
You can act upon finding elements. Click on a button using.click(), send text using.send_keys(), and submit a form using.submit(). You can select options from drop-down menus, check boxes, or retrieve text from the page.
In short, you close the browser with driver.quit() or driver.close(). That is how you finish your session and release memory. These simple commands allow you to log in, search, enter forms, and verify if websites function correctly. Mastering these steps is the secret to creating your web tests with Selenium WebDriver.
Working with Different Browsers
Selenium WebDriver supports all major browsers, allowing automated tests to be run without altering test code. Each browser requires a specific driver, which can be downloaded and configured in the system settings or a program. For Safari, the driver is packaged with the browser on macOS, so no extra setup is required.
Running your test cases with different browsers assists in the determination of browser-dependent bugs and guarantees that your site functions across all browsers. Interchanging browsers quickly in Selenium only requires changing the driver employed in your environment. Cross-browser testing is useful for trustworthy web testing and ensuring a similar experience everywhere.
Handling Web Elements and User Interactions
Selenium WebDriver automates web and interacts with web elements like buttons, text boxes, drop-downs, radio buttons, and checkboxes using methods like ID, name, class, XPath, or CSS selector to enable users to perform complex actions using mouse and keyboard.
Selenium WebDriver also provides wait strategies for web pages to load, making tests stable and less prone to fail if the page is slow. These traits enable Selenium WebDriver to test most user interactions and ensure a flawless website for everyone.
Writing and Running Your First Test Script
Writing your first test script using Selenium WebDriver is easy and an excellent way of getting started with automated web testing. Use the following steps to develop and execute your first script.
Step 1: Set Up Your Project
Ensure Selenium WebDriver is properly installed and your browser driver is set up. Open your IDE and initialize a new project for your test script.
Step 2: Start the Browser Session
Set up the browser you wish to use, say Chrome or Firefox. This opens a new browser window for testing.
Step 3: Go to the Website
Inform Selenium where to go on the web by providing the URL. The browser loads the page you wish to test.
Step 4: Find Web Elements
Specify actions you need to take on certain elements, for example, text fields or buttons. Utilize simple ways to locate such elements by ID, name, or other properties.
Step 5: Perform Actions
Fill in fields with text, click buttons, or submit forms. These activities mimic what a genuine user performs on the site.
Step 6: Check the Results
After these steps, verify whether the expected results are visible. Observe messages or page changes to ensure that your test was successful. Utilize assertions to verify actual and expected results.
Step 7: Close the Browser
Finish the test by closing the browser session. This releases resources and completes your test.
Step 8: Review and Improve
In case of errors, inspect your script and configuration. Provide comments for understanding. Practice and modify your scripts as you come to know more.
Best Practices to Work With Selenium WebDriver for Beginners
You can easily start with Selenium WebDriver if you adopt some quality best practices. Following these best practices will enable you to write efficient and stable test scripts:
- Structure Your Scripts
Organize your test scripts in properly named directories and bestow them with descriptive names. This is because it is easy to locate, modify, and restructure as the project is expanding.
- Write Clean and Simple Tests
Begin with simple and concise scripts. This is easier for learning what a script does and debugging.
- Use Assertions
Add assertions to determine if your test results are real. Assertions inform you whether a test passed or not, making your tests stronger and valuable.
- Debug and Keep in Order Periodically
Review error messages and print statements to locate issues. Debug issues step by step. Refresh scripts every time the website is refreshed to maintain your tests running and operating.
- Keep Learning
Practice writing and running scripts regularly. Learn from errors and continue practicing your skill. Creating good habits here will come in handy in tackling larger projects.
Common Challenges and Troubleshooting of Selenium WebDriver
New users of Selenium WebDriver will have some common problems during their initial exposure. Learning how to identify and debug them will enable you to test easily. The following are common challenges;
- Driver and Path Issues
Most beginners do the driver wrong or never set the path. Make sure you have the correct driver for your browser and that the path is properly set. Check through your code for spelling errors.
- Element Not Found
Sometimes, Selenium is unable to find elements because pages are too slow to load. Use waits so the elements get an opportunity to display. This steadies your tests.
- Compatibility Issues
Driver or browser bugs can cause failures. Make sure your browser and drivers are updated to prevent these issues.
- General Troubleshooting Tips
If you see your test failing, inspect the error message carefully. Look up on the internet for a solution or go through an example. If you are stuck, get assistance from forums. Troubleshooting is a skill worth having, and with practice, you will find yourself more proficient at fixing issues.
Cloud Testing for Making Selenium WebDriver Easier
Cloud testing is critical for simplifying the use of Selenium WebDriver, especially when dealing with cross-browser testing at scale. Setting up and maintaining local environments can be time-consuming, error-prone, and limiting when it comes to real-world device coverage.
One such platform that makes this easier is LambdaTest. It is an AI-native test execution platform that allows you to run both manual and automated tests across 3000+ real browsers and OS combinations, eliminating the need for complex local setups.
If you’ve ever asked, “What is Selenium, and how can I use it effectively at scale?”, LambdaTest provides the answer. When used with Selenium WebDriver, it enhances your automation efforts by enabling parallel execution, which significantly accelerates release cycles and improves test coverage.
With real-time analytics, seamless CI/CD integrations, and powerful debugging tools, LambdaTest helps your QA team identify issues faster and work more efficiently.
By moving your Selenium testing to LambdaTest, you gain the ability to scale reliably, reduce infrastructure costs, and ensure your web applications run smoothly across any browser or device.
Conclusion
To sum up, Selenium WebDriver is an excellent automation tool for web testing. It directs new beginners to learn how to test websites in other browsers. Using basic commands, you can open pages, click buttons, and verify results.
Begin with simple scripts and do it regularly. You should follow the best practices to make your tests fit and healthy. Debug and continue if you get stuck. Selenium WebDriver is relied upon by thousands of testers and organizations. Embark on this journey today and discover how easy web automation can be.

Scrap metal recycling is a powerful force for environmental sustainability, economic growth, and community renewal. While often considered a basic environmental practice, recycling scrap metal does so much more. It lessens landfill burdens, supports cleaner manufacturing, and creates stable job opportunities. In thriving economies and developing regions alike, scrap metal dealers NJ and recycling professionals fuel a circular economy that benefits both people and the planet. By fostering these practices, communities set a strong foundation for future well-being and resource conservation.
The ripple effect of metal recycling goes far beyond conservation. Regenerated metals power sustainable manufacturing, reduce demand for mining, and promote safer waste management at the neighborhood level. Across the globe, communities that embrace recycling are also finding innovative ways to rebuild after disasters and to adopt cutting-edge technology for greater efficiency. Understanding these broad impacts helps illustrate how recycling transforms urban centers and rural livelihoods alike.
Environmental Benefits of Scrap Metal Recycling
Recycling scrap metal serves as one of the most effective strategies for reducing solid waste and conserving finite resources. Every ton of steel or aluminum recycled lessens the pressure on landfills and saves thousands of pounds of iron ore and coal from being extracted. Conserving these raw materials curtails habitat destruction, lowers air and water pollution, and slashes greenhouse gas emissions. For example, the Environmental Protection Agency notes that recycling metals consumes far less energy than producing from virgin resources, thereby lowering the carbon footprint of manufacturing and infrastructure projects (EPA).

Economic Impact on Local Communities
Beyond its green credentials, the scrap metal recycling sector functions as an economic engine in urban, suburban, and rural settings. In the United States, the industry generates more than $100 billion in economic activity annually and employs over half a million workers. It creates jobs across a spectrum of skill levels, from collection crews to advanced processing technicians. This, in turn, helps support local economies by generating over $4 billion annually in state and local tax revenue, which finances public amenities such as schools, parks, and emergency services.
Technological Advancements in Metal Recycling
Technology continues to reshape scrap metal recycling, ushering in an era of precision, efficiency, and smarter resource recovery. Adaptive optical sensors, powerful robotics, and artificial intelligence are enabling the sorting and purification of scrap streams quickly and with greater accuracy. One standout innovation is the Shear Assisted Processing and Extrusion (ShAPE) system, which recycles consumer aluminum waste into high-quality products with significant energy savings, cutting energy use by up to 90 percent compared to traditional methods, according to the U.S. Department of Energy.
Community-Based Recycling Initiatives
Many of the world’s most successful recycling programs stem from grassroots and community-based efforts. Local recycling centers and neighborhood drop-off points make it easy and convenient for residents to participate. Schools and civic groups often incorporate educational campaigns and reward programs that encourage recycling and teach the importance of resource stewardship. These local initiatives reduce illegal dumping, bolster social cohesion, and demonstrate that sustainability is a shared responsibility within communities.
Case Study: Los Angeles Fire Recovery
When catastrophic wildfires struck Los Angeles, the cleanup presented formidable challenges but also opportunities for positive transformation. Led by the U.S. Army Corps of Engineers, recovery crews prioritized recycling metal debris and concrete rubble from destroyed homes and businesses. Materials once destined for landfill were instead funneled back into the construction supply chain, fueling both rebuilding efforts and local economic growth. Such strategies not only turn disaster waste into a resource but also help stricken neighborhoods regain a sense of agency and hope.
Global Perspective: Zimbabwe’s Scrap Metal Collectors
Scrap metal recycling is equally vital across different cultural and economic landscapes. In Harare, Zimbabwe, informal metal collectors help mitigate urban waste while supporting their families. Despite facing difficult working conditions and limited access to formal recycling channels, these individuals play a key role in closing the recycling loop and reducing pressure on the environment. Their work exemplifies how grassroots recycling, even in developing regions, contributes to both environmental health and economic resilience.
Future Outlook and Challenges
The future of scrap metal recycling is bright but not without hurdles. Worker safety, regulatory compliance, and the integration of advanced technology into older waste management systems remain areas for improvement. Policy support, community engagement, and ongoing investment in technology and infrastructure are essential for maximizing the benefits of recycling. As demand for sustainable materials increases, the importance of strong recycling networks and innovative practices will only grow.
Conclusion
Scrap metal recycling stands as both a practical solution and a transformational strategy for communities worldwide. Through the combined impact of reduced environmental harm, expanded job opportunities, technological advances, and empowered local initiatives, this industry proves indispensable for sustainable growth. Communities that nurture and prioritize metal recycling are ensuring a cleaner, more prosperous, and more resilient future for themselves and future generations.

Why Smart Locks Are Gaining Popularity
Over the past decade, the popularity of smart locks, including access control systems Orlando, has increased due to technological advancements and changing attitudes towards security. The integration of smart technology into everyday life, such as thermostats and refrigerators, has led to increased expectations for robust protection, convenience, and efficiency in locking systems. People are increasingly drawn to solutions that offer flexible access and remote control features, with access control systems now commonly included in renovation plans for homes and small businesses. The peace of mind that comes with verifying door lock security from afar has shifted expectations, making smart locks an essential part of modern living.
What Are Smart Locks and How Do They Work?
Smart locks provide electronic control over entry points, replacing or augmenting traditional locks. They use authentication methods like smartphone apps, keypads, keycards, voice recognition, or biometrics to allow access, making misplacing keys a thing of the past. These locks enable users to unlock doors, view entry history, and remotely grant or revoke access, benefiting busy professionals, parents, property managers, or business owners who manage shifting schedules and multiple users. Popular smart locks are designed for seamless integration with major smart home ecosystems like Amazon Alexa, Google Assistant, and Apple HomeKit. Consumers value the ability to monitor and control entry while away, ensuring loved ones and property remain secure even when they can’t be physically present.
Choosing a Smart Lock: Key Features to Consider
- Connectivity: Selecting the appropriate communication method—Wi-Fi for global remote access, Bluetooth for local convenience, or Z-Wave for advanced home automation—is crucial to maximizing the lock’s potential in your space.
- Physical Security: Always verify that the smart lock meets recognized security standards, such as ANSI/BHMA, to ensure it can withstand brute-force attacks and tampering, as well as traditional deadbolts.
- User Management: Look for locks that allow for temporary, scheduled, and permanent access to be shared digitally, so you don’t have to hand over or recover physical keys ever again.
- Integration: Compatibility with smart home platforms can be a game-changer if you’re looking to create a more interconnected and automated environment.
- Power Supply: Battery life matters—prefer models that provide advanced warnings when batteries are running low and offer backup key entry or emergency power in the event of an outage.
A well-chosen smart lock should fit seamlessly into the daily routines—and tech setups—of those using it. It’s worth reading product reviews and talking to other users about what works well for homes or businesses similar to yours.
Future Trends in Smart Lock Technology
Smart lock technology is rapidly advancing, with manufacturers incorporating features like voice recognition, biometric reading, and AI that learns user behaviors. AI will help identify routine versus suspicious access, alerting owners to unusual activity. Some locks are also exploring eco-friendly batteries and solar charging. The smart lock market is projected to reach $5.69 billion by 2029, driven by increasing digital threat awareness and a demand for advanced encryption and customization options.
Smart Locks and Residential Security Data
Smart locks enhance security by making it difficult for intruders to enter unnoticed, contributing to a decline in burglary rates alongside the rise of connected home security solutions. They provide users with entry histories and real-time alerts, allowing quick responses to suspicious activity. This increased transparency boosts feelings of safety, and some insurance companies offer discounts for properties with smart locks, which is also beneficial for landlords and business owners managing multiple users.
Benefits of Smart Locks for Workplaces
Transitioning to smart locks in the workplace provides clear and immediate advantages. Handling physical keys can be both tedious and expensive; for instance, if an employee misplaces a key, it might necessitate replacing the entire lock. Smart locks remove this worry by enabling real-time updates of digital permissions when an employee departs or when access needs alter for any reason.
Organizations that frequently deal with deliveries, contractors, or shift changes particularly benefit from features such as scheduling and access logs. Additionally, the ability to track who entered and when fosters accountability and bolsters security. For administrators, managing access through digital means reduces the time spent on logistics, allowing them to focus more on what is truly important to the business.
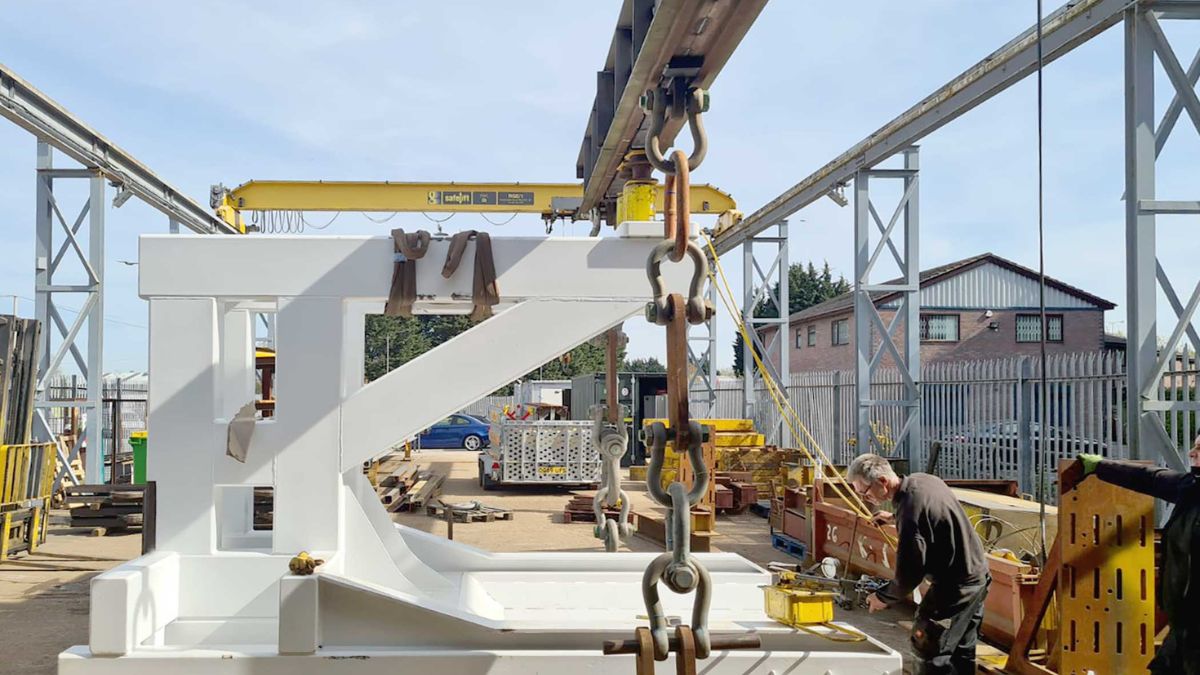
Understanding Proof Load Testing
Maintaining a safe working environment is not just about creating policies; it is also about following through with essential safety procedures. In industries such as construction, shipping, and manufacturing, lifting equipment is the backbone of operations. The failure of a lifting device can cause catastrophic injuries and significant financial losses. That is why proof load testing is regarded as a foundational aspect of safety management.
Proof load testing involves applying a controlled load, often exceeding the equipment’s rated capacity, to verify its ability to perform safely under stress. This proactive initiative is designed to catch structural weaknesses or fatigue before equipment is put to regular use. For those interested in regional solutions, proof testing Houston, TX, can help ensure your lifting devices meet the required standards.
During proof load testing, certified professionals use specialized tools to simulate real-world loading conditions. This thorough approach is not just about equipment validation; it also serves as a critical safeguard for workers and reduces the likelihood of operational downtime due to unexpected equipment malfunctions.
According to guidelines established by the Occupational Safety and Health Administration (OSHA), this kind of safety testing is both a best practice and a regulatory requirement for many types of lifting machinery.

Equipment Requiring Proof Load Testing
Various types of lifting equipment, both large and small, require regular proof load testing. Among the most critical are:
- Overhead and gantry cranes
- Hoists and winches
- All forms of lifting slings, including wire rope, chain, and synthetic options
- Shackles, hooks, lifting beams, and other critical rigging hardware
The failure of any of these components during use can result in dropped loads, injuries, or fatalities. This necessity makes routine inspection and proof-load verification a non-negotiable part of maintenance schedules.
Frequency and Triggers for Testing
When should proof load testing be conducted? Safety experts and industry regulations point to several key triggers:
- Before the initial use of new equipment
- After any significant modifications or repairs
- As part of scheduled, periodic reviews, frequency often depends on usage cycles and environmental conditions
OSHA guidelines mandate that custom lifting devices be tested to 125 percent of their rated load before being put into service. These proactive steps are essential for both brand-new equipment and older devices that have seen repairs or heavy use.
Consequences of Neglecting Proof Load Testing
Failing to perform scheduled or required proof load tests can have serious repercussions. The obvious impact is the increased risk of workplace accidents and injuries when equipment fails unexpectedly. Companies can also be left vulnerable to:
- Costly legal actions and OSHA fines for non-compliance
- Significant damage to reputation that affects both employee morale and client relationships
- Permanently tarnished business credibility due to well-publicized safety failures
Work-related fatalities or severe injuries due to preventable equipment failures are catastrophic for everyone involved. The direct and indirect costs of insurance increases and litigation, as well as workforce disruption, can cripple organizations that do not make safety testing a regular priority.
Best Practices for Conducting Proof Load Tests
To maximize the value and reliability of proof load testing, experts recommend several best practices. These include enlisting certified testing professionals familiar with current OSHA and ASME requirements, using well-maintained, calibrated equipment, and maintaining detailed documentation of all results. Regularly reviewing and updating testing protocols ensures your organization keeps pace with technological advances and regulatory changes.
Training personnel on current test methods and maintaining detailed records are just as vital as the tests themselves. These records can be essential for audits, legal matters, and ongoing risk assessments. For continued industry insight and news, reputable sources such as Safety+Health Magazine provide extensive coverage on industrial safety developments.
Final Thoughts
Proof load testing is a non-negotiable pillar of workplace safety for organizations utilizing cranes, slings, hoists, and related equipment. It provides unequivocal evidence of an equipment’s safety and fitness for use, helping to prevent workplace injuries, avoid non-compliance fines, and foster a robust safety culture. The small investment of time and resources in regular proof load testing is far outweighed by the benefit of accident prevention, compliance, and operational peace of mind.
-

 Entertainment1 year ago
Enchantment & Excitement: Crafting Unforgettable Event Experiences
-

 GENERAL1 year ago
From Fan Art to Original Works: The Diversity of doujindesu Creations
-

 GENERAL1 year ago
England Business Visa Requirements for American and International Citizens in 2025: A Guide for Entrepreneurs
-

 Fashion1 year ago
Best Shampoos and Treatments from OZ Hair and Beauty for Thinning Hair: Strengthen and Revitalize Your Strands
-

 GENERAL1 year ago
Crossword Conundrum: The Significance of vault opener nyt crossword
-

 GENERAL1 year ago
Latest Trends in Men’s and Women’s Jackets for the Upcoming Season
-

 GENERAL1 year ago
French Language Learning for Kids: A Joyful Path to Bilingual Brilliance
-

 GENERAL1 year ago
Exploring the World of nhentai.nef: A Comprehensive Guide for New Users